* I have now updated this pattern & it is for sale in my Etsy store! *
I have realised I am hopeless with this blog thing! I haven't posted anything since June! Well, it's not because I haven't been busy....actually it's quite the opposite! In between being a mum to four beautiful, growing and crazy kids, I have found time to make things, some of which I'll share one day. But for now, with Halloween approaching, I've posted a 'Monster Rag Doll Tutorial'. I came up with this doll pattern for a friend's daughter who wanted to me to run a 'sewing party' for her 9th birthday! She wanted to make 'monster dolls' based on the Monster High dolls she is obsessed with. I think these ones are a great alternative, especially for younger girls like my almost 4 year old!
Print off pattern (it should fit on A4) and cut out pattern pieces. Choose skin colour and trace around body and ears onto the back of the fabric with a pencil. Choose fabric for the arms and legs (I like to choose all different fabrics to make my monster dolls more bohemian looking!) and do the same thing, tracing around the pattern pieces with a pencil on to the wrong side of the fabric.
Step 2
Cut out pattern pieces leaving about 1/2 cm seam allowance around each piece.
Step 3
Sew the legs, arms and ears together following the pencil line.
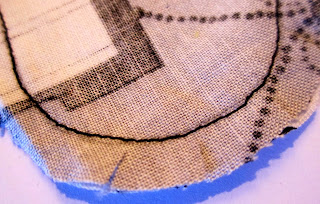
Trim aorund the curved edges making small cuts around the curves so that they turn easier (be careful not to cut through the stitching!)
Step 4
Cut out some clothes for your doll based on the body pattern. I traced around the doll body (leaving out the head) and made up a few dress patterns but you could do anything...patchwork, vests, stripes etc. Make sure the clothes cover all of the body and add belts or patches to jazz it up a little! This is your chance to get as creative as you want, remember, she's a monster so crazy and messy is good!
Sew clothes onto the body of the monster doll, on the right side of fabric, front and back. I use zig zag stitch to cover up the edges (around the neck, and over the sides of the belt). You want all edges on the right side of the doll to be well attached so they won't come off or fray too much.
Try to match the belt so when the bodies are sewn together they match on the seam.
Step 5
Before sewing bodies together you need to turn your arms, legs and ears inside out (I push a pencil in the end & push through as shown in pics). Then stuff your arms and legs nice and firm. Put a little stuffing in ears too (although not too much).
Step 6
This is probably the trickiest step of the doll making process. Put the two body pieces right sides together. Match where the ears should go (according to marks on pattern) and pin ears inside the head (point facing down).
Do the same with the arms placing them inside the body, between to the two inner layers, and pinning the edges together.
Then pin the rest of the body together so it looks something like this (a bit lumpy with the ears and arms pinned inside)....
Next, sew body together, following along pencil line. This is a little tricky as you need to make sure you are sewing the arms and the ears in well, but I find that if you take your time and go very slow it works fine.
Step 7
Before turning inside out, make small cuts around the curves of the head as you did with the arms and legs earlier. Then turn your monster inside out. Your arms & ears should be neatly attached, seams on the inside.
Stuff your doll nice and firm, especially the head! Leave about an inch of space at the bottom.
Step 8
Pin the stuffing in the doll about an inch from the bottom (this makes it easier to sew the bottom hem). Fold up the bottom of the doll with about a 1cm seam. Insert the two legs (each one placed right against the seam edge with a gap in the middle) and pin into place.
Sew across the legs as close to the bottom edge as you can. You may need to sew this twice to make sure the legs are secure, just make sure it's fairly tidy as this seam can be seen. If you want to make it more hidden, you could also hand sew this seam. Remove the pins holding back the stuffing.
Step 9
Your doll is now finished and just needs hair and a face!
I made my hair by ripping pieces of fabric into 1cm strips and adding various shades of wool, but you could use anything you want!
I attach my hair by dividing it in three sections and pin a section behind each ear and one in the middle of the head, just to balance it out. I then hand stitch the hair to the doll's head, making sure I go through all the layers of hair a few times so they don't get pulled out.
I also twisted some of it in front of the ears and stitched it in place on the side of the head just to frame the face. Make sure it is stitched in well, especially if kids are going to be playing with it!
Step 10
Now you just need to make your face!! Sew on buttons for eyes, felt for a patch and draw on your face with a waterproof marker or you could embroider it instead! Don't forget to add some monster features like fangs or a stitched mouth!!!
I also added some extra embellishments like a button on the foot or a bow on the dress!
You're doll is finished! Enjoy making many different dolls, they are addictive!!!
I hope my you can follow my tutorial as it is my first one! Any problems, feel free to make a comment below so I can help you!
Happy Halloween!


